
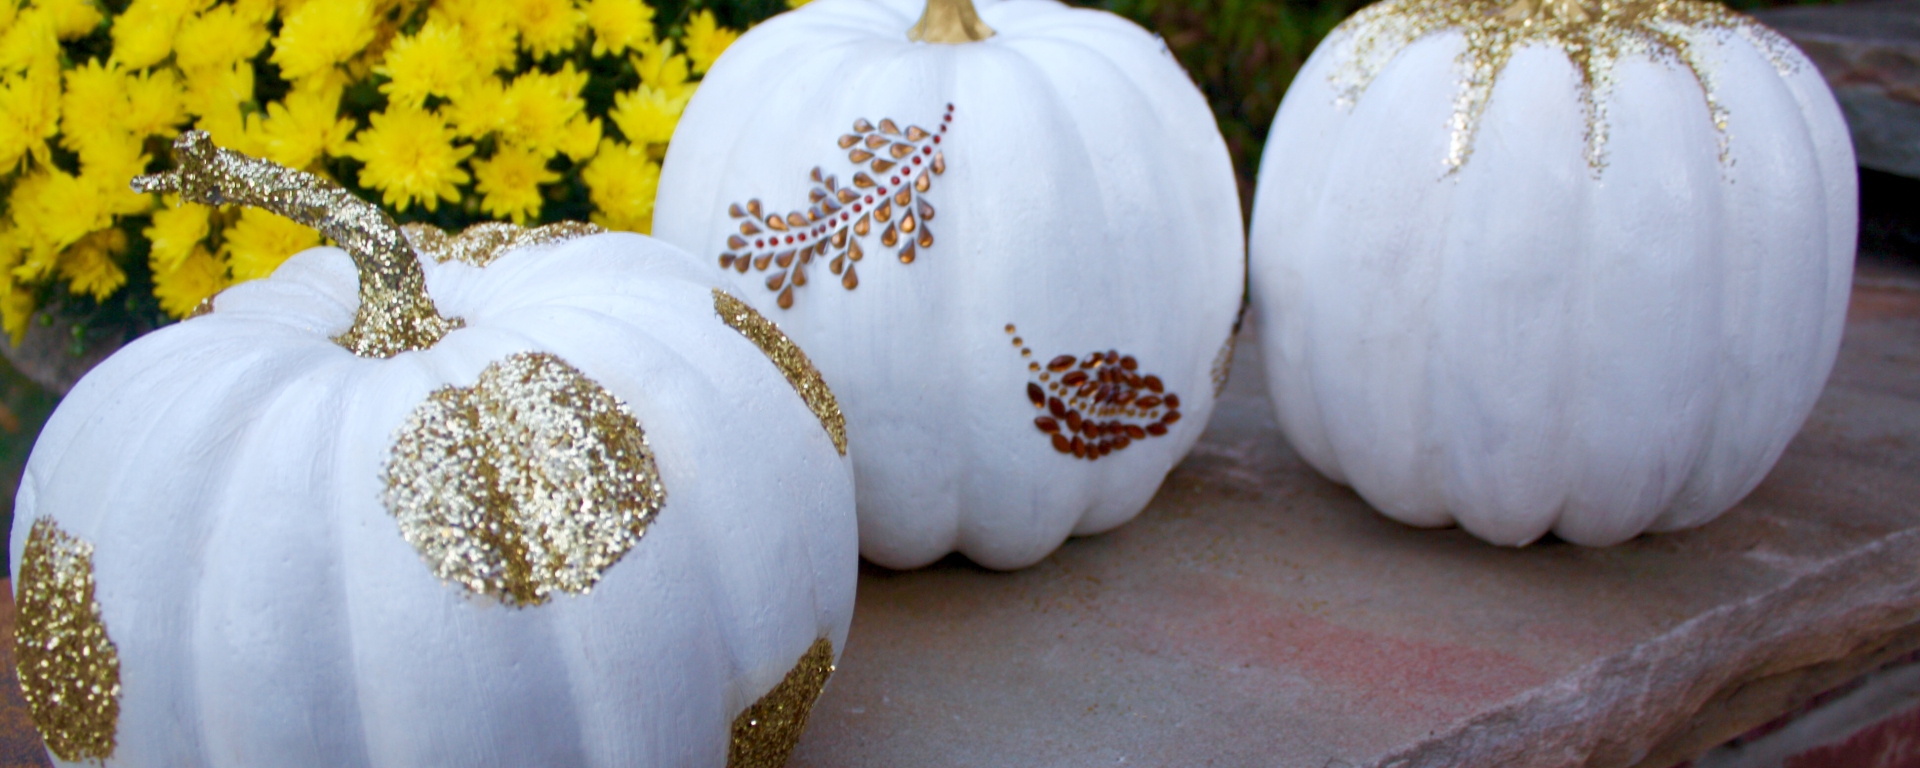
Fall is here! And if you’re like me, decorating for Fall and Winter holidays is life. I tend to lean away from the creepy/scary Halloween decor and opt for cutesy and fun items to display on my desk at work and my bedside table at home. For this DIY project, I’m going to transform plain, cheap pumpkins into glitzy pieces that will brighten up my office even on the most blustery Fall day!
You will need:
- Plastic pumpkins (I bought mine from Walmart for about $6 each)
- At least one brush of any size (I only used one for the whole project)
- Mod Podge
- White acrylic paint
- Gold acrylic paint
- Gold glitter
- Rhinestone stickers
- Paper or styrofoam plate
- Glass of water (to rinse your brushes)

Step 1
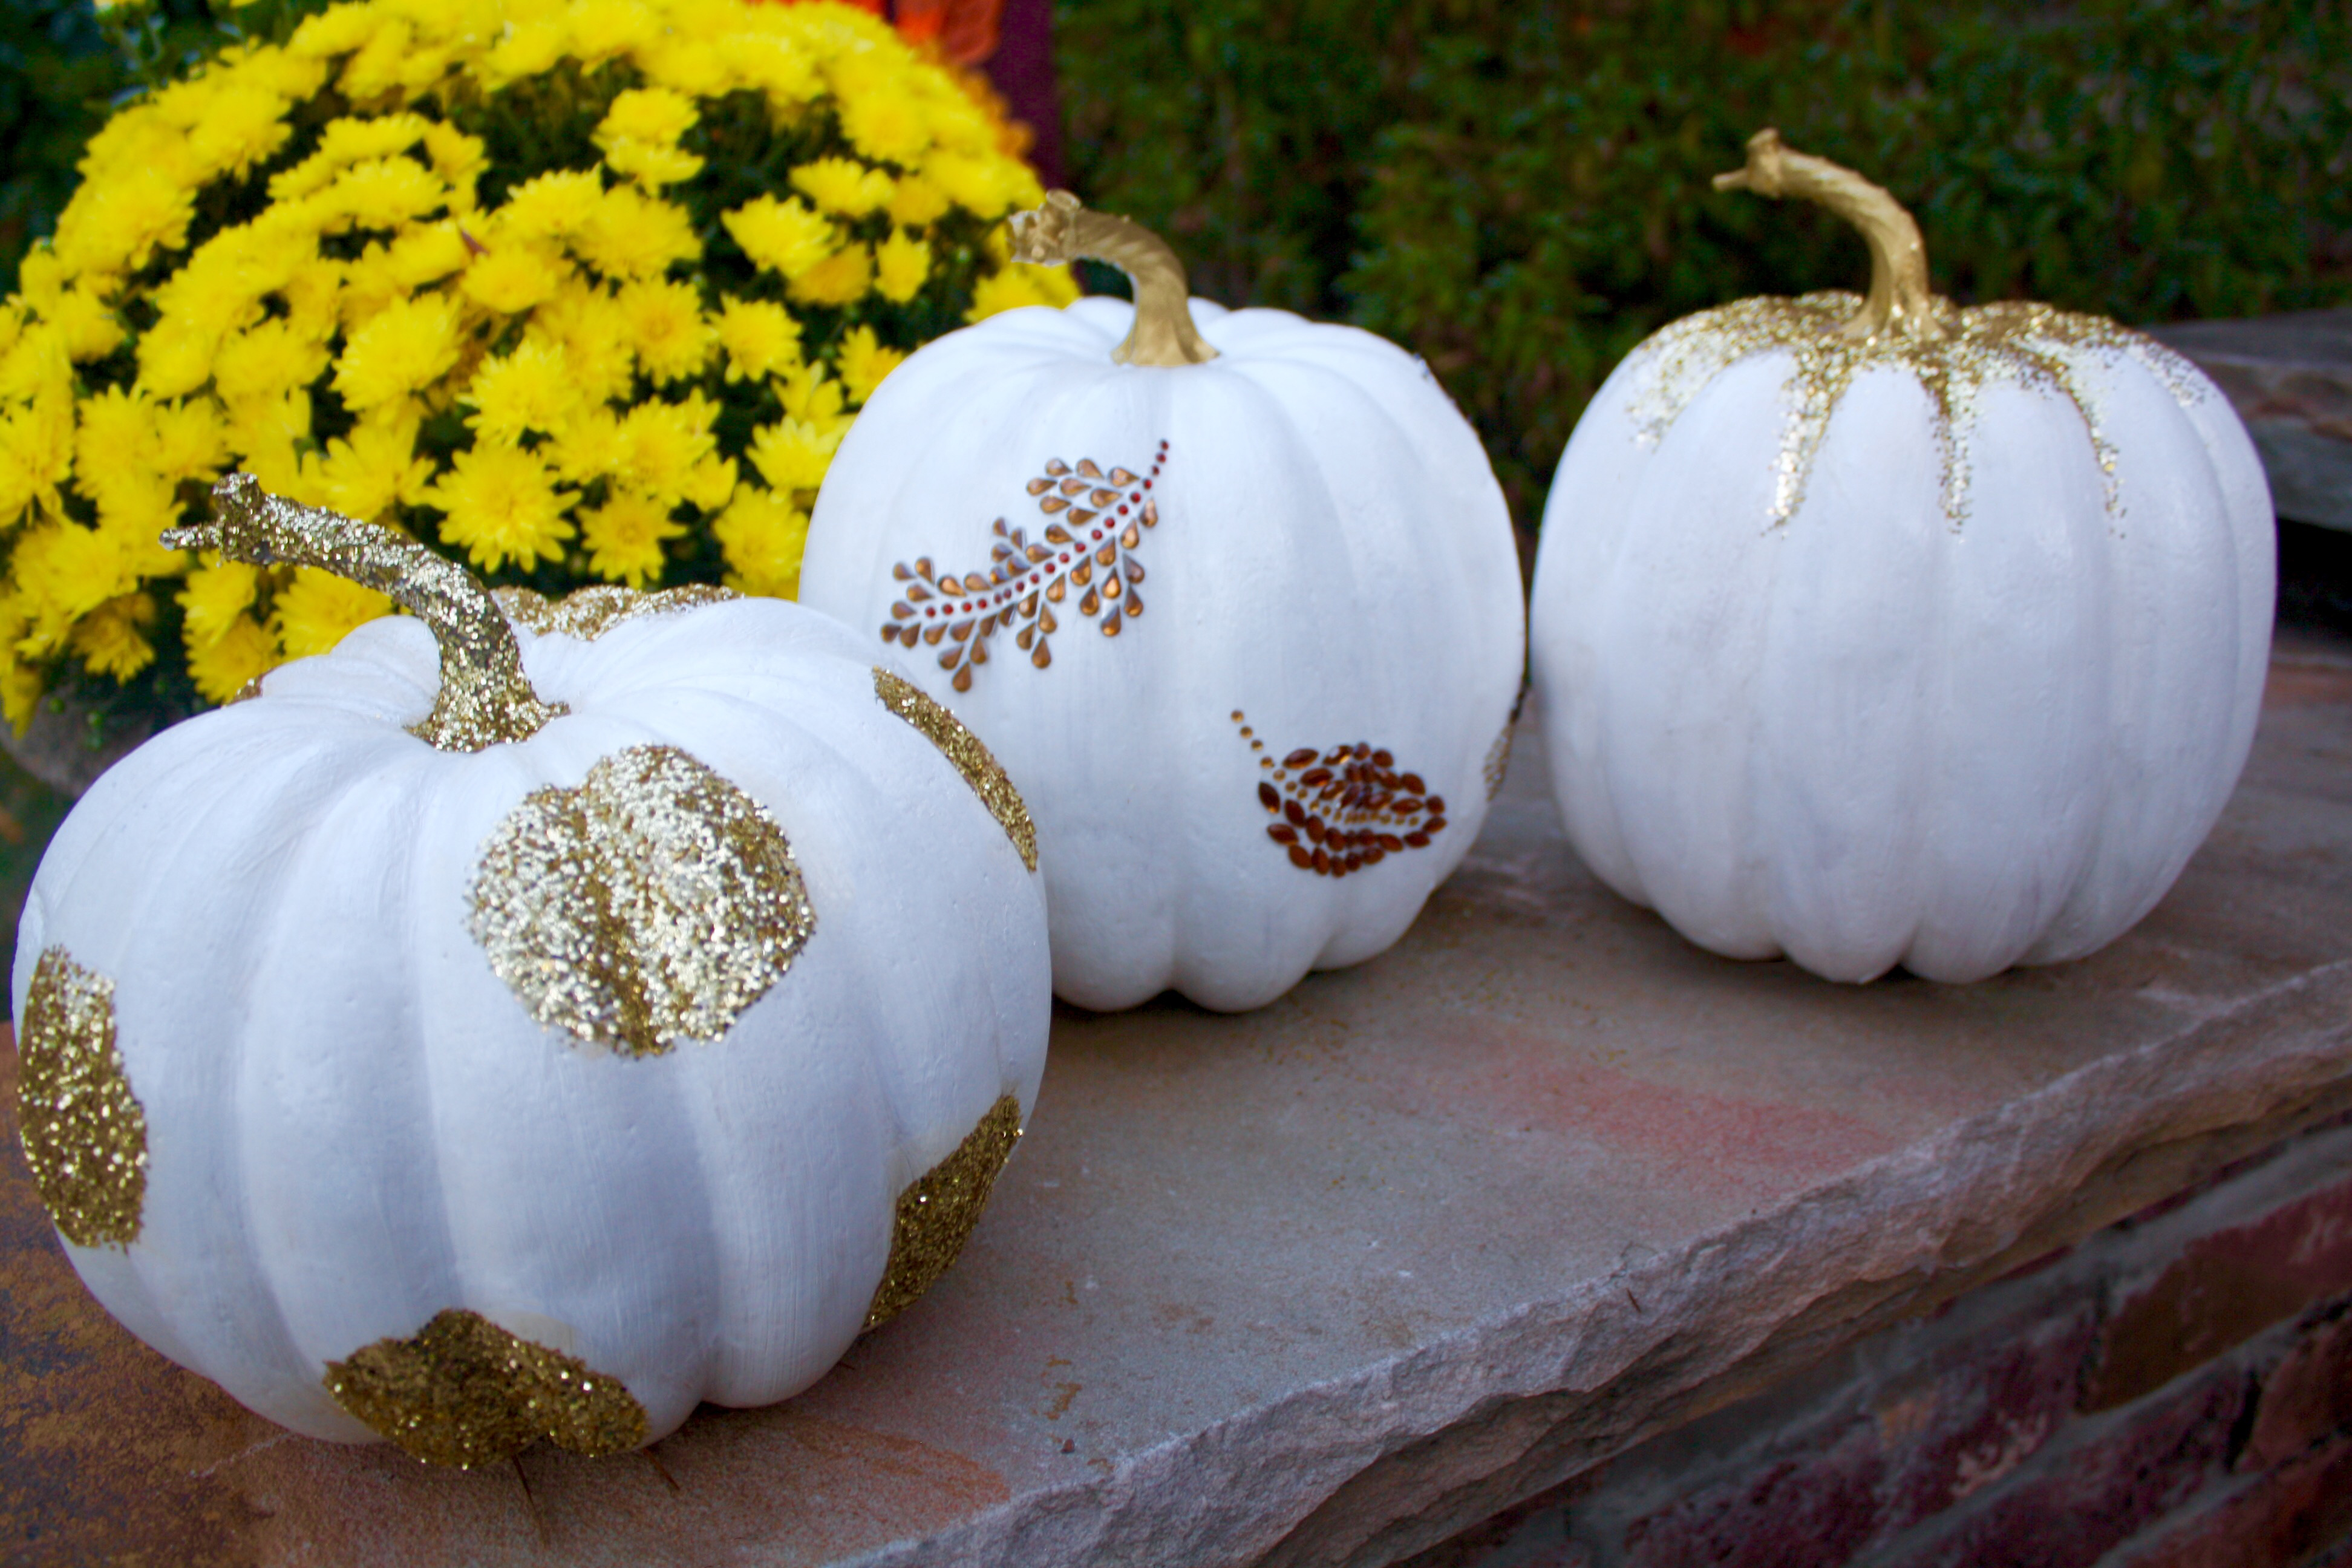
We need to turn our plain orange pumpkins into a dazzling white! Dip your brush into the white acrylic paint and begin your first coat. Make sure the paint goes on as evenly as possible; we don’t want lumpy pumpkins! After you’ve finished your first coat, allow the paint to dry. I painted the entire pumpkin, including the bottom, in one go so I hung my pumpkin by it’s plastic stem on the edge of a patio chair to dry.

Step 2
Go in for your second coat of white. Use your own judgement for a third coat. I didn’t think a third coat was necessary for mine so I stopped at two.
Step 3
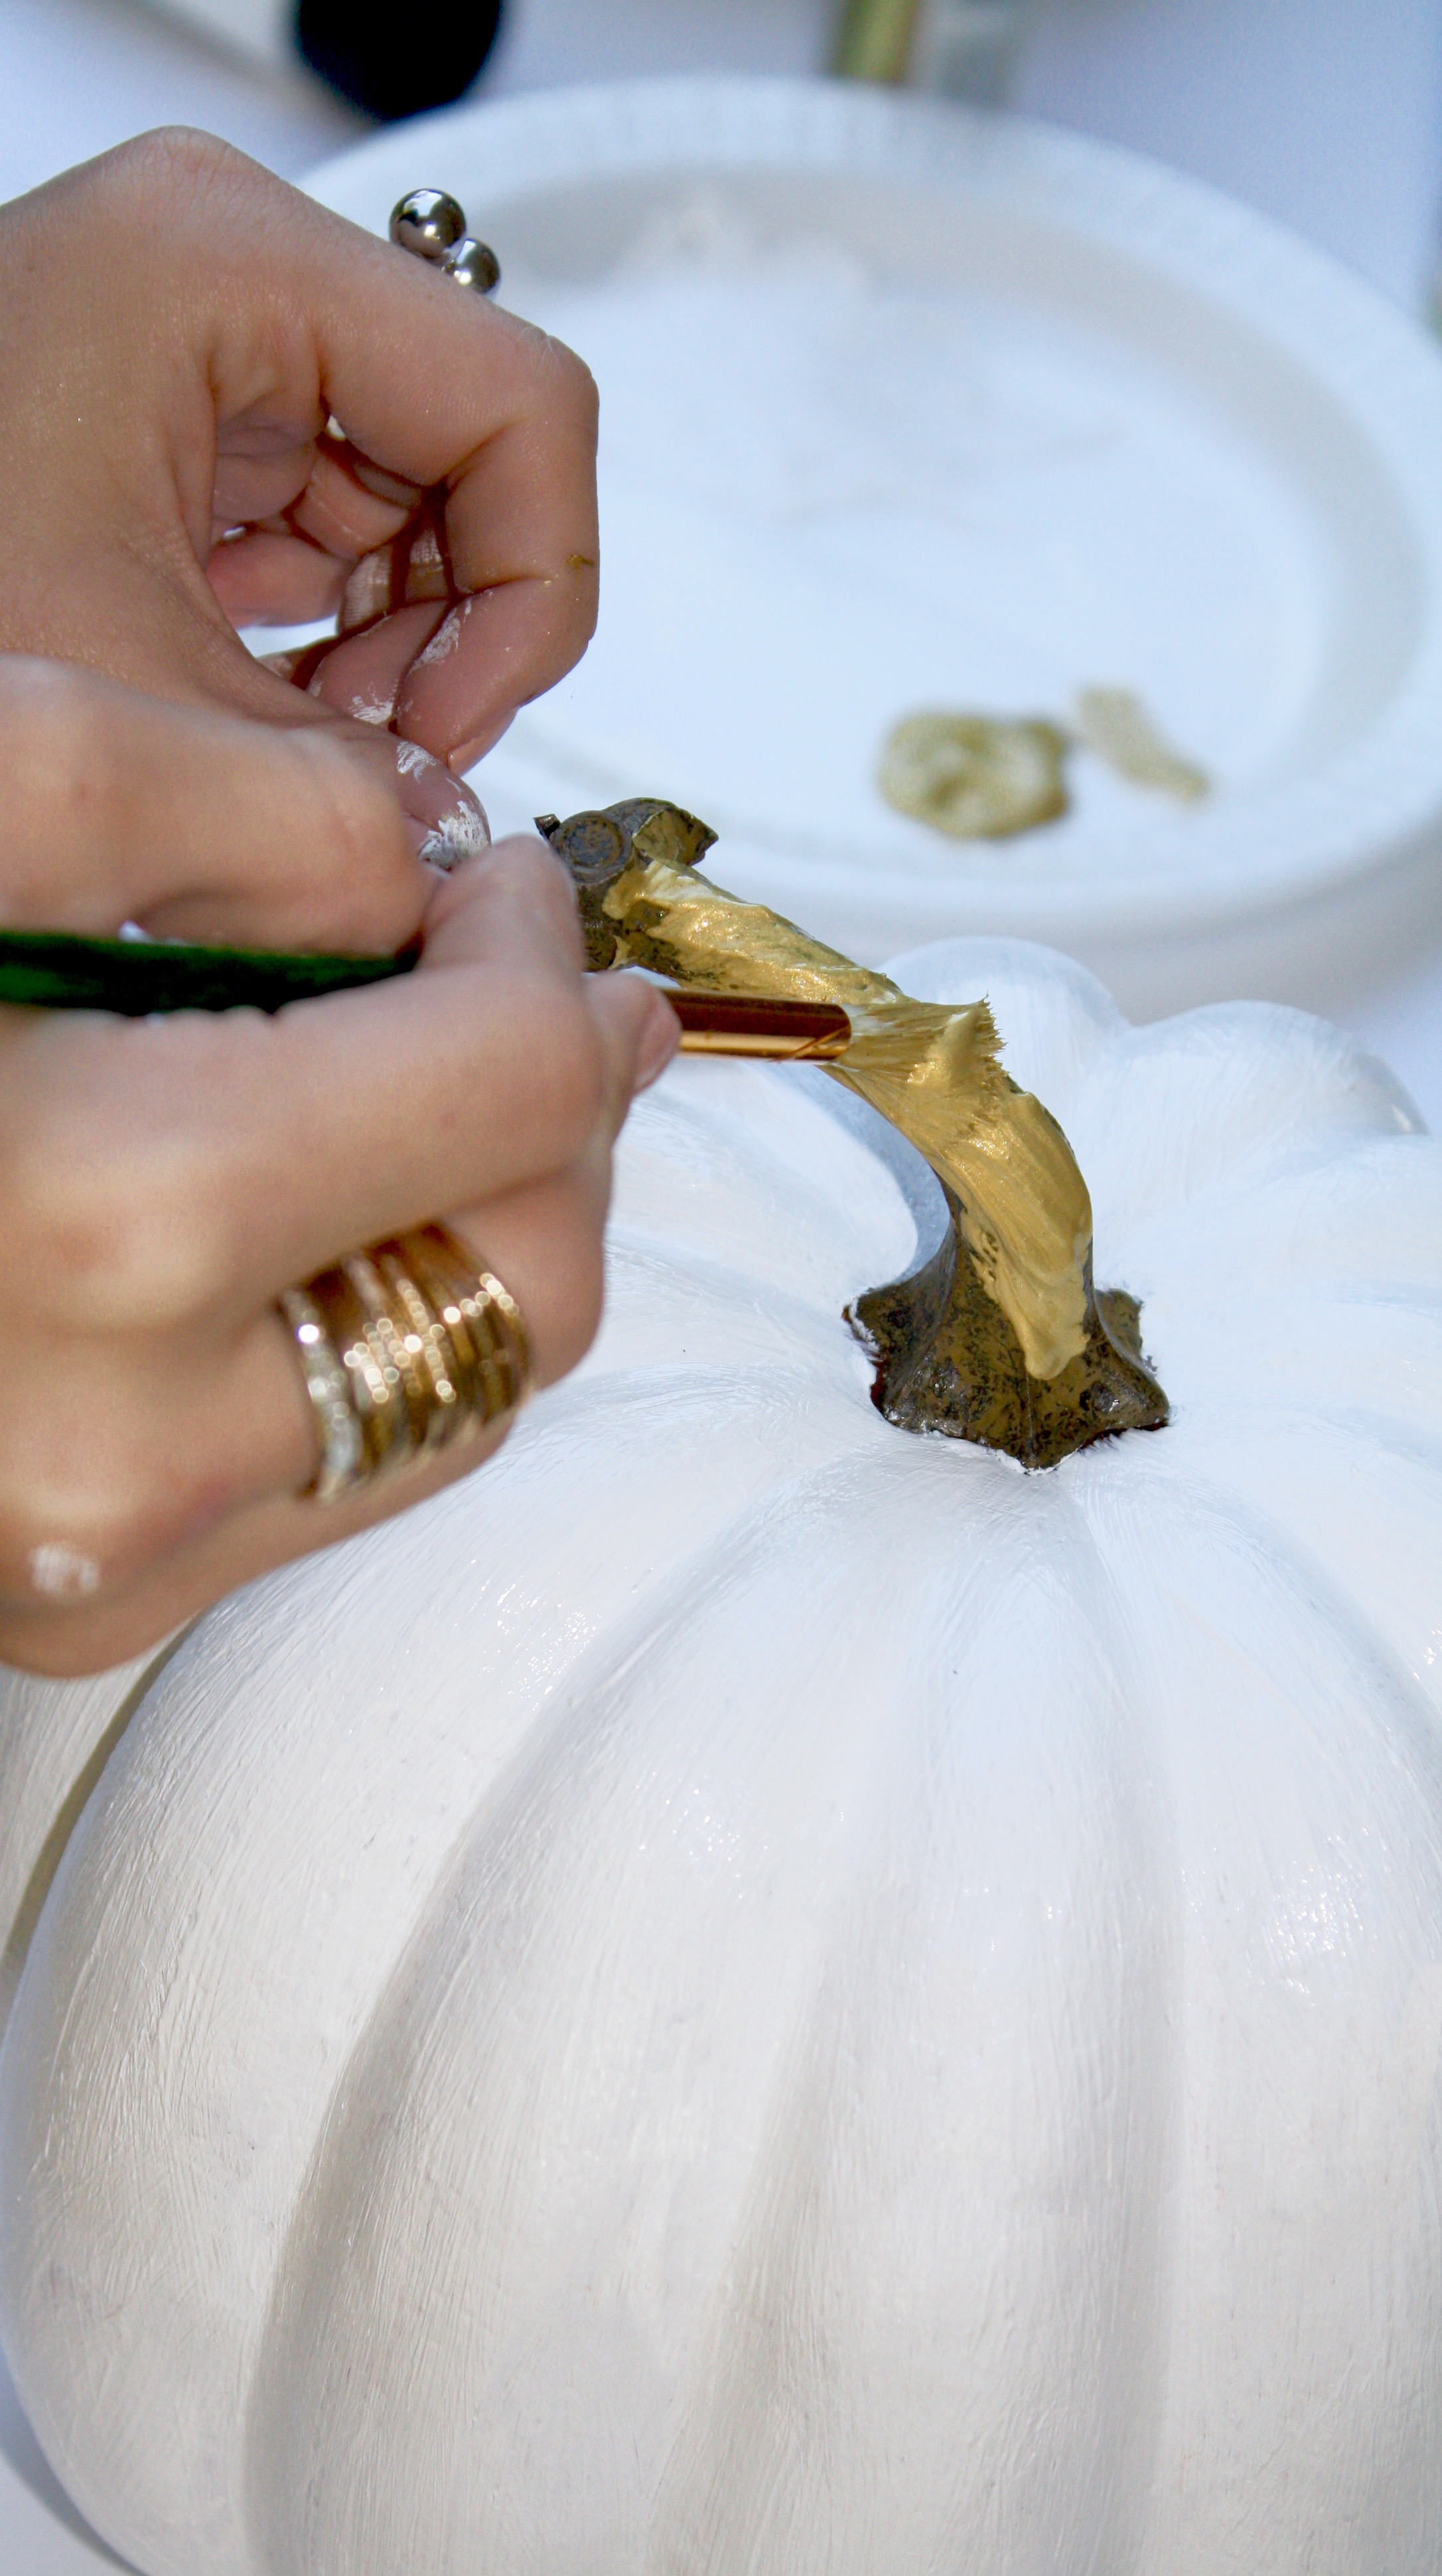
Now it’s time to jazz up those plain stems! For one pumpkin, I used glitter and for the other two, I simply used two coats of gold paint. To glitter the stems: see Step 4. To paint the stems: dip your brush into the gold paint and lightly begin your first coat on the stem. The stems on my pumpkins were very bumpy and textured so I really had to be careful to not clump my paint! I used two coats of gold paint on both of the stems.
Step 4
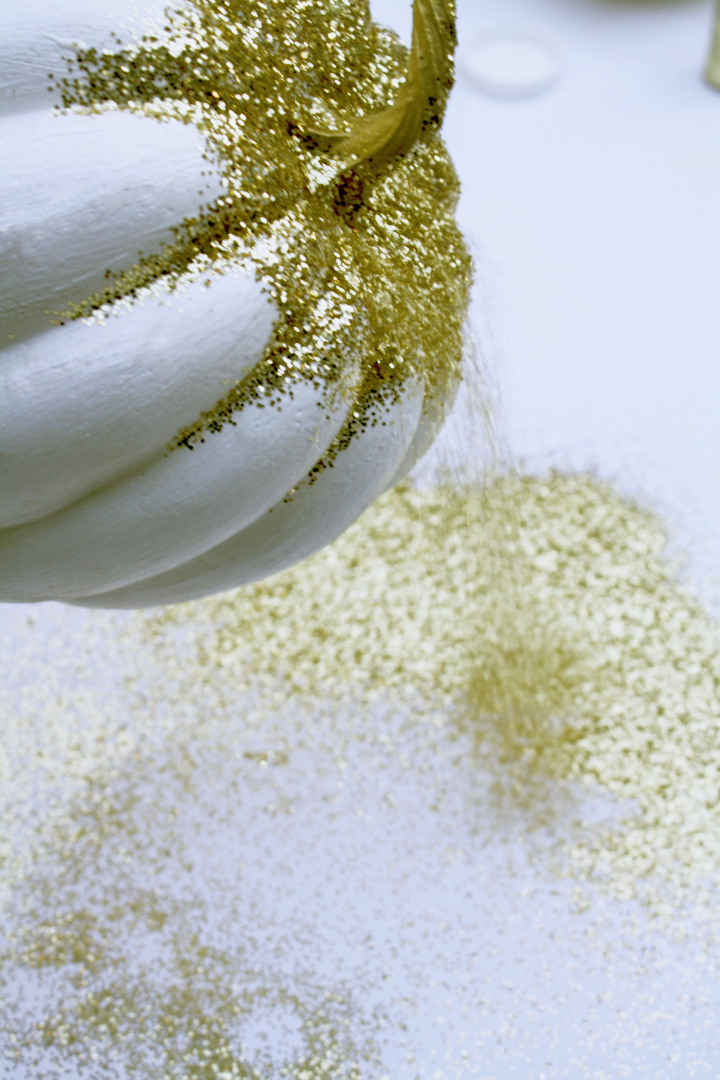
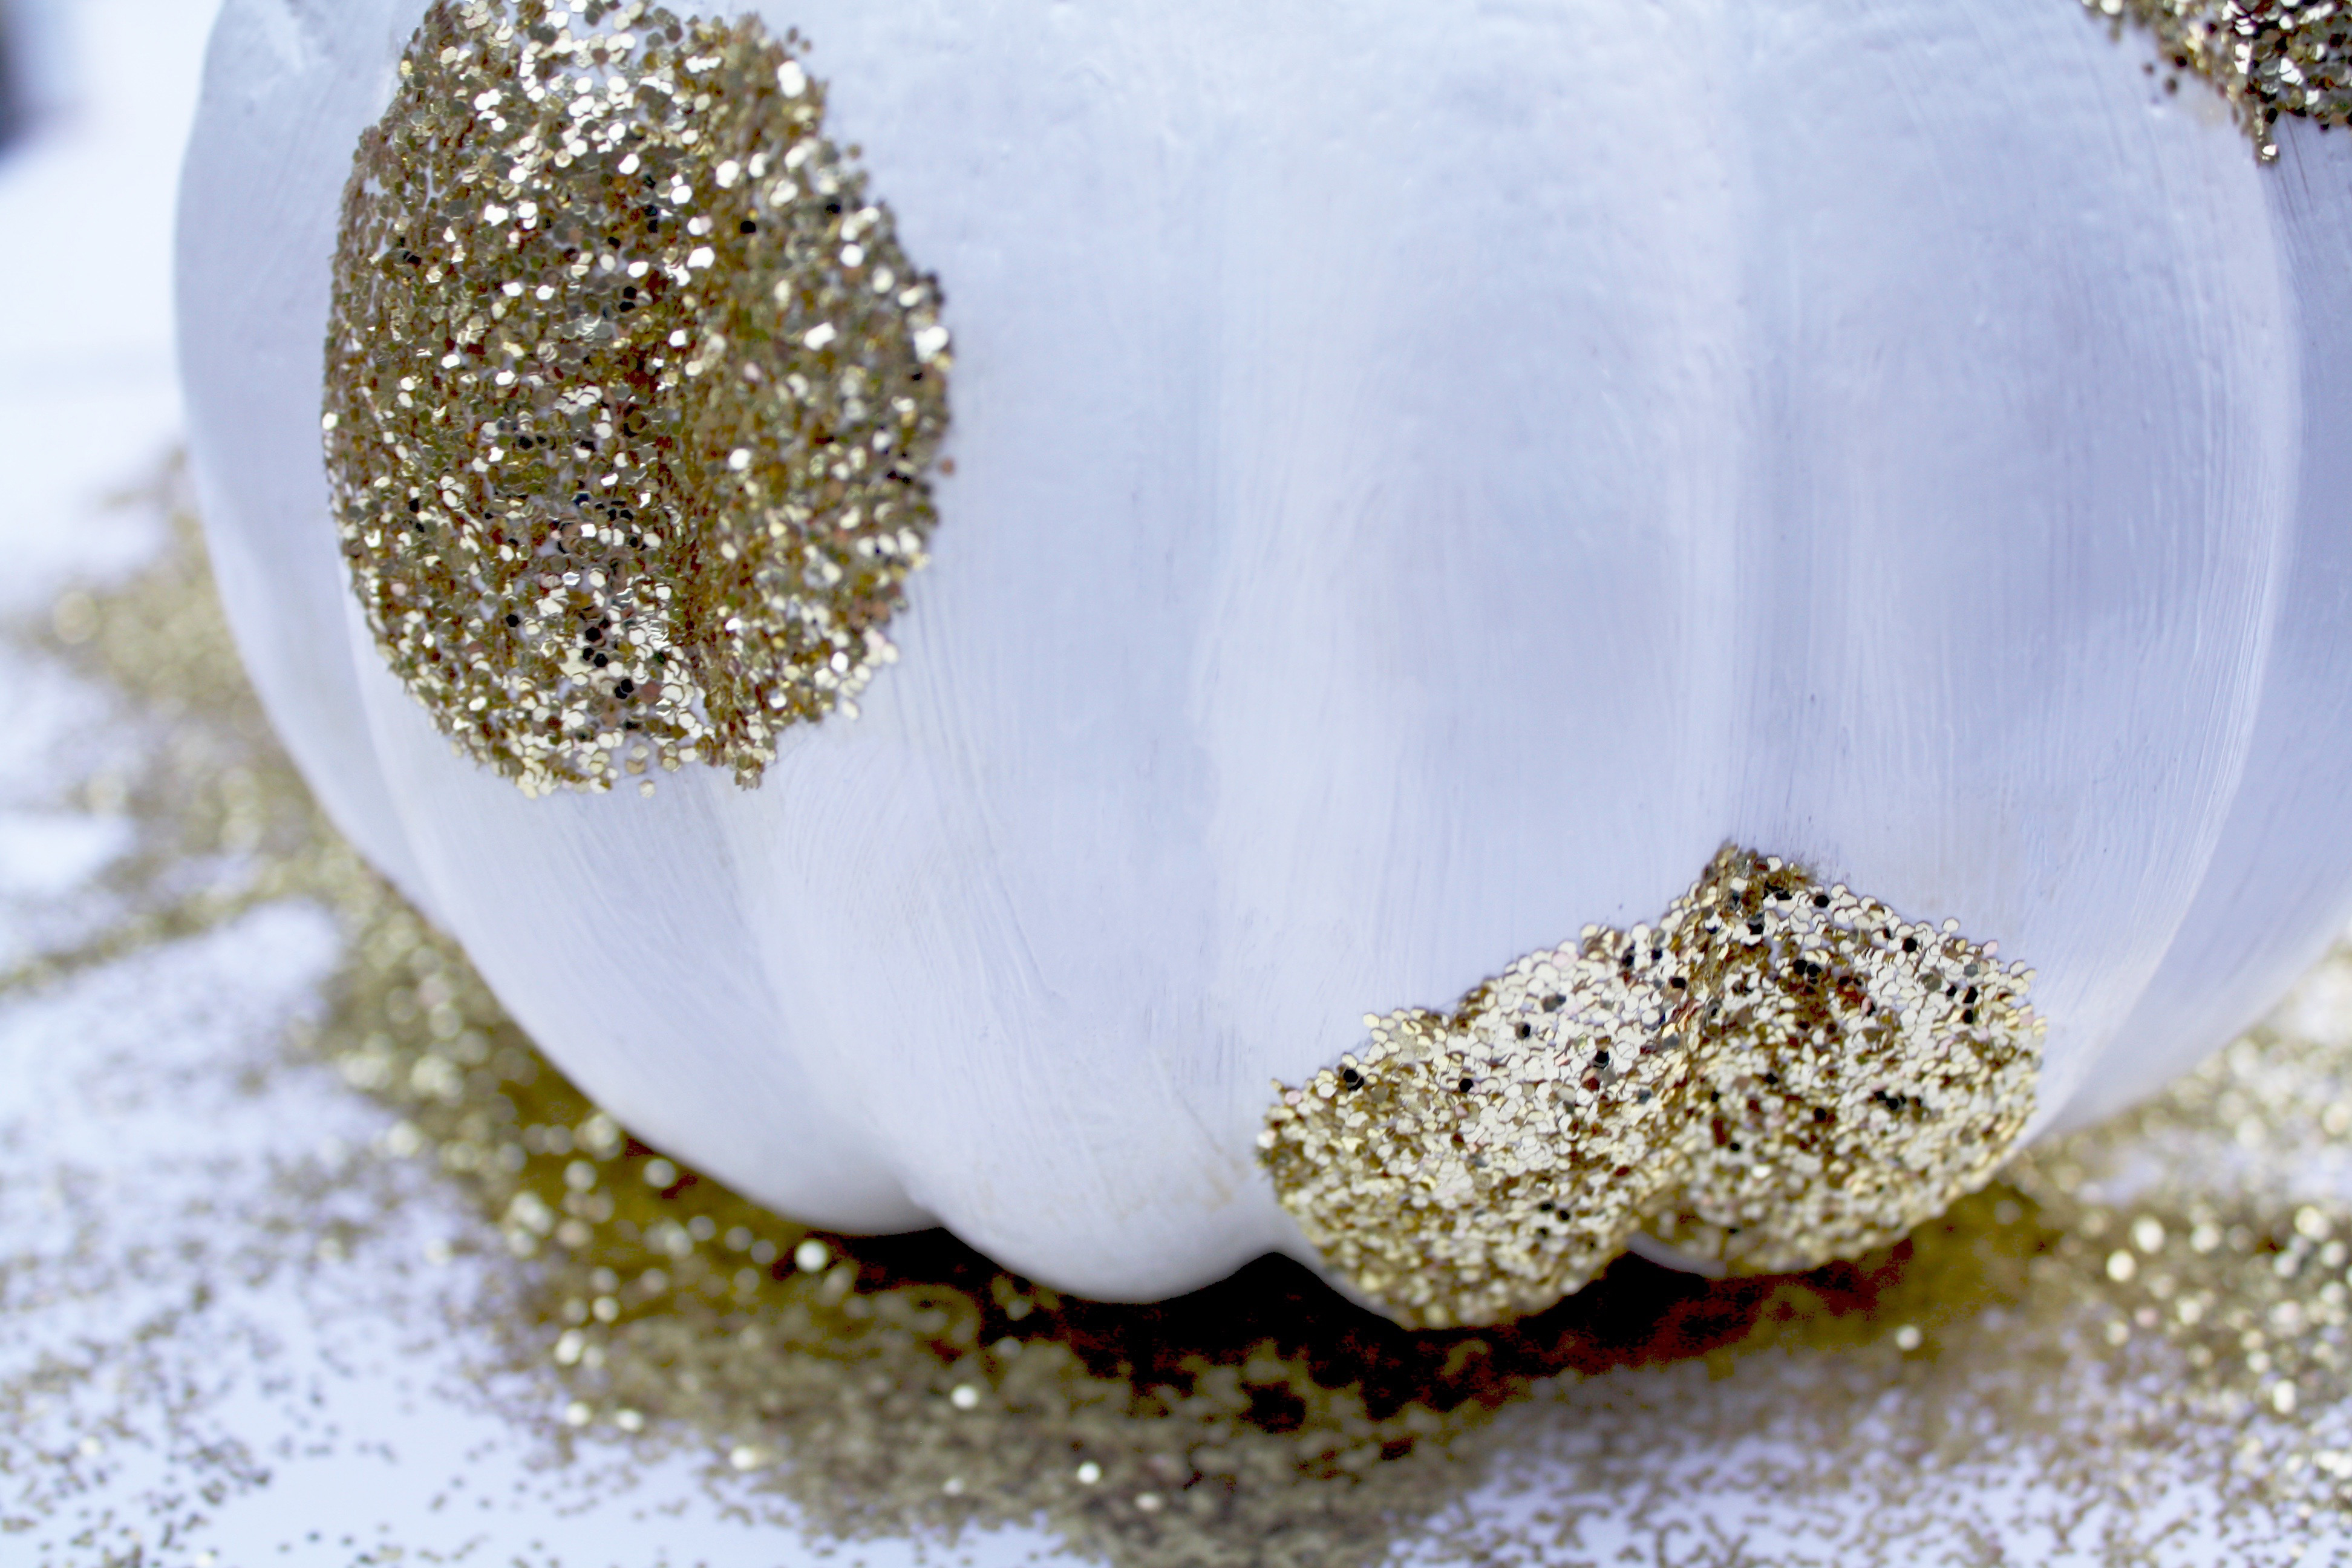
Now it’s time to glitter! Before you begin, make sure you are doing this on a surface that can easily be cleaned up. Glitter tends to go everywhere and stick everywhere! I completed the whole project on my outdoor patio table covered with white poster board from Hobby Lobby.
Dip your brush into the Mod Podge and paint it anywhere on the pumpkin you want the glitter to stick. For one pumpkin, I brushed the glue on the top around the stem then brushed downward in between the grooves of the pumpkin so that the glitter, once applied, would have a cascading effect. On another pumpkin, I drew circles all around the pumpkin using a pencil and the cap of the Mod Podge jar then brushed the Mod Podge within the circles. Immediately after you finish brushing on the Mod Podge, take the jar of glitter and slowly pour it onto the wet area of the pumpkin.

 Once you’re sure the wet areas have been completely covered, pick up your pumpkin and carefully turn it over so that all the excess glitter falls off onto your work surface. Once you’ve shaken off all the excess glitter, let dry.
Step 5.5
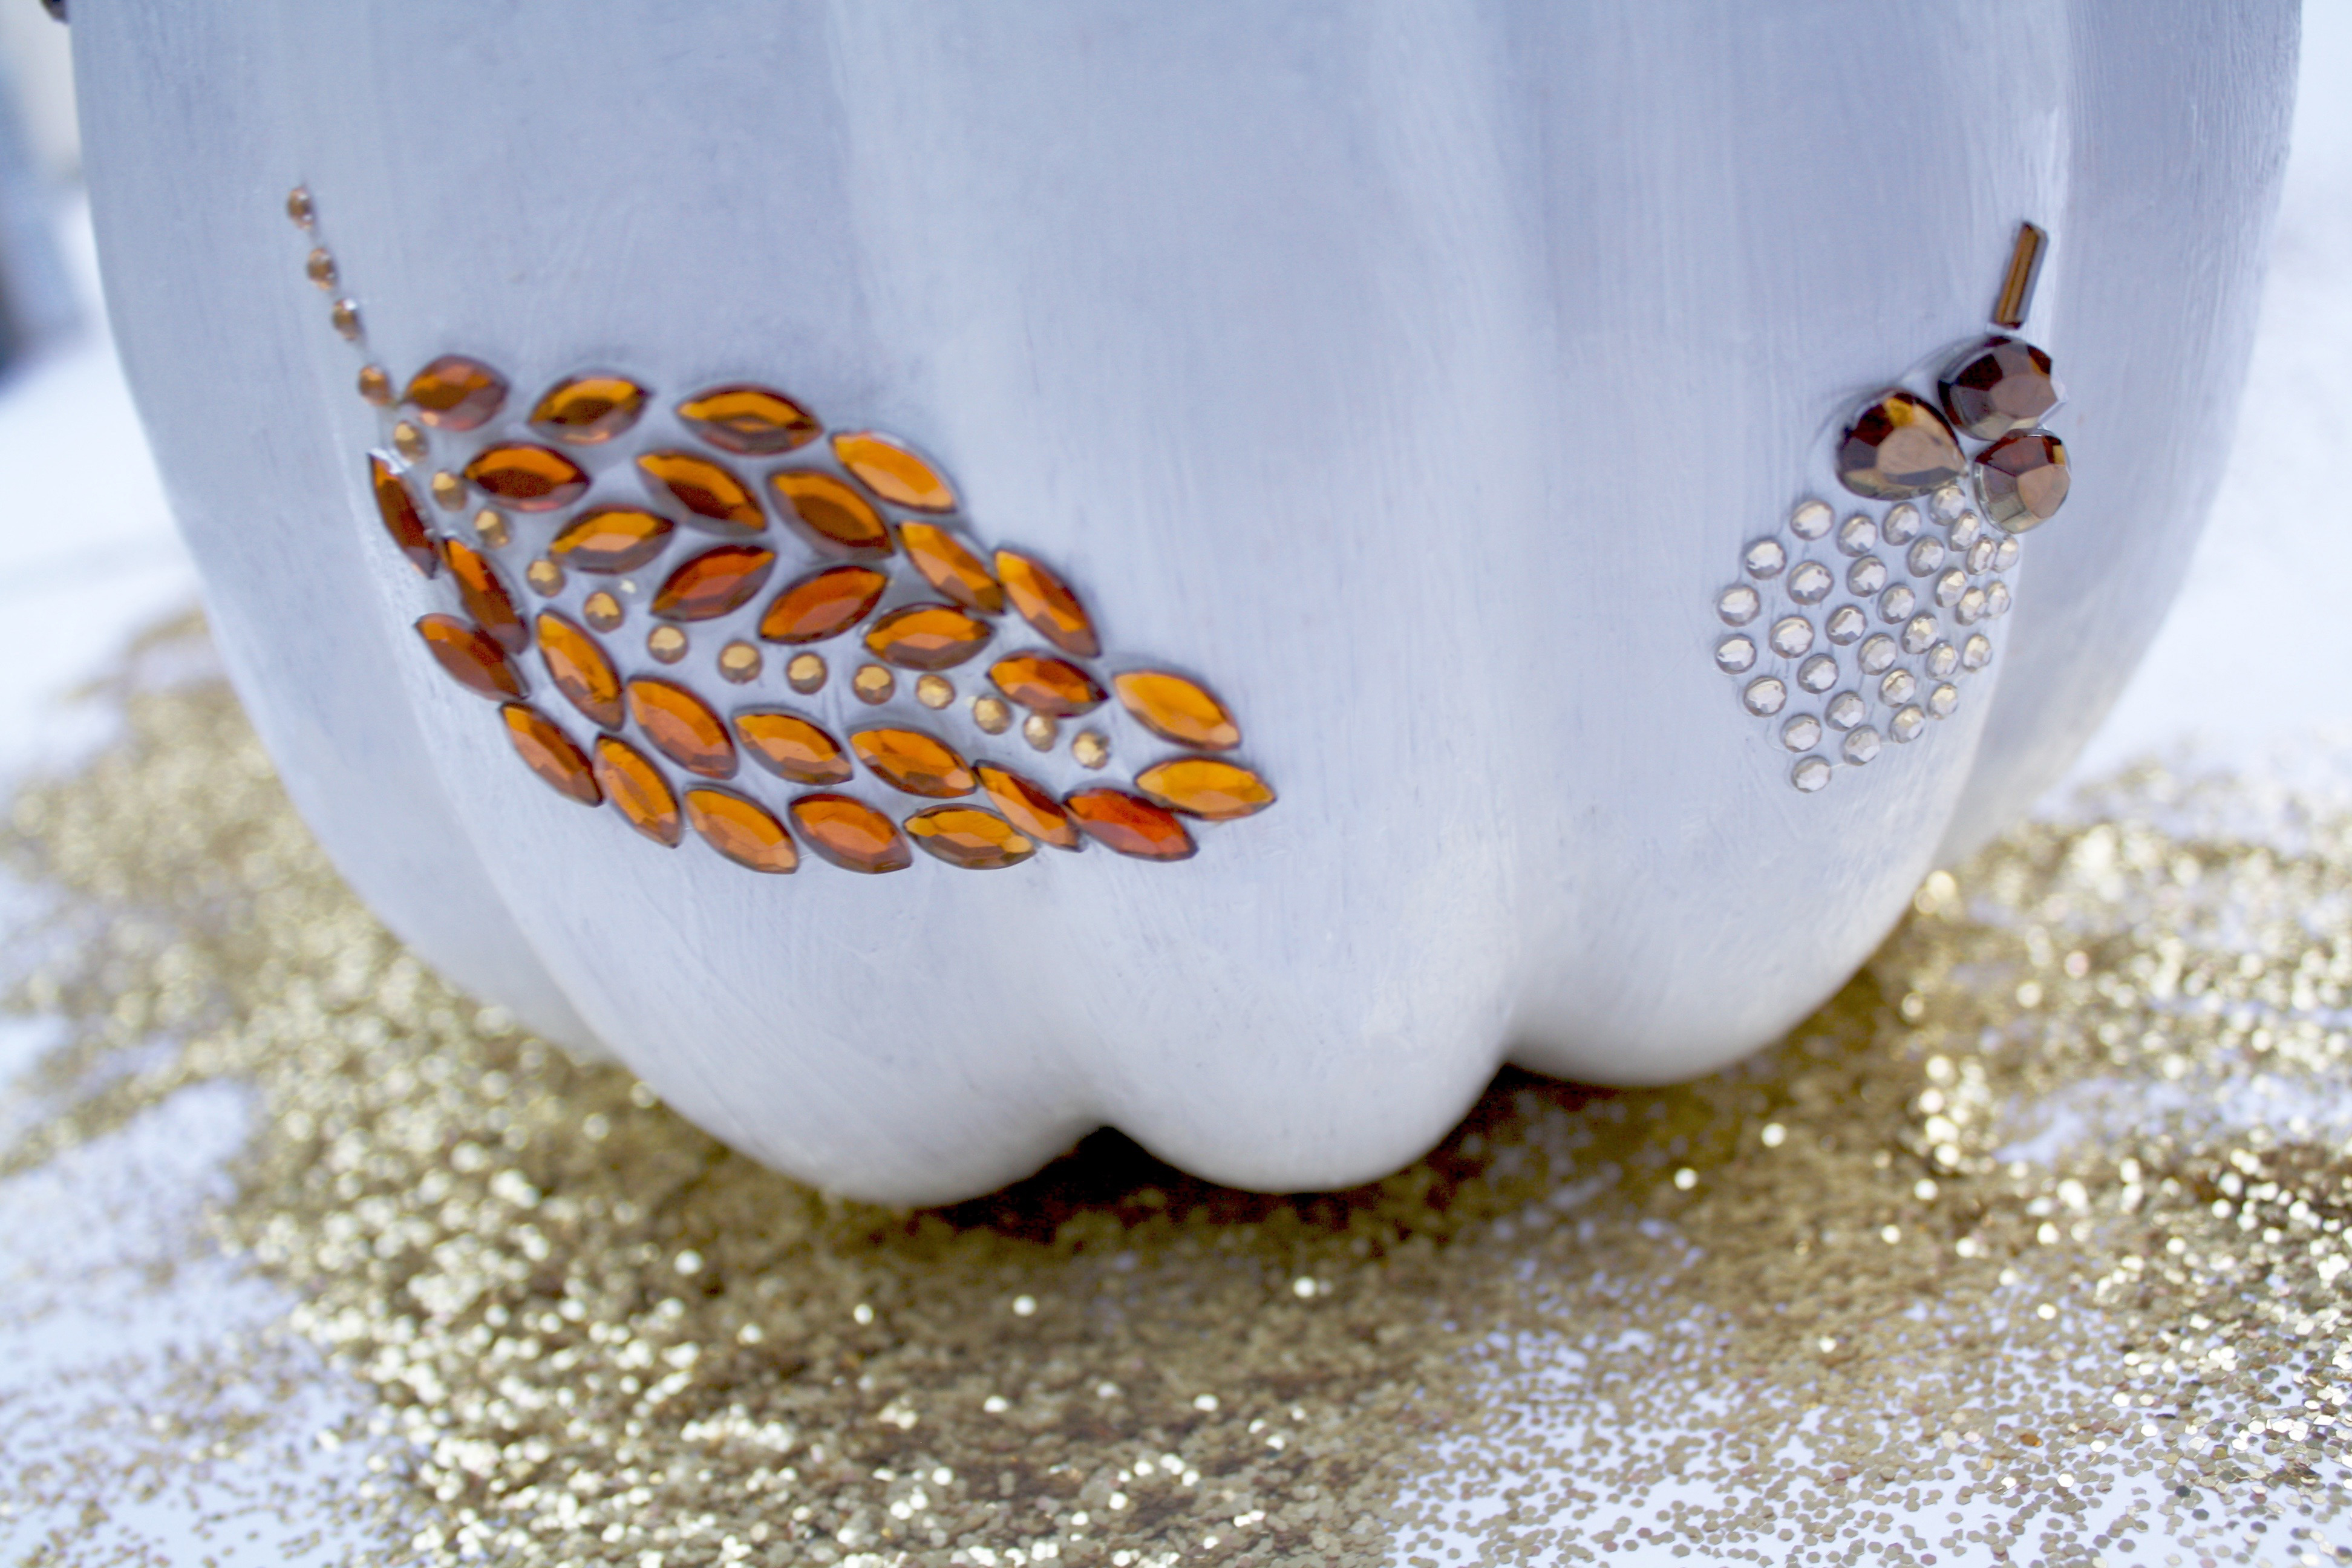
On the third pumpkin, I used rhinestone stickers instead of glitter and glue for embellishment. These stickers can be found at Walmart for only a few dollars per sheet. Simply peel the sticker from the package and stick on the pumpkin. Voila! A cute but painless and glitterless pumpkin.

Step 6
After the glitter has dried, clean up the edges of your designs by taking a dry brush and lightly dusting off any glitter pieces that may have stuck to the pumpkin in unwanted places.

Step 7 (optional)
If you don’t want your glitter to “shed” as the season goes on, spray the glittered areas with a clear glaze. Glaze sprays can be found at Hobby Lobby or Michael’s and are pretty inexpensive and multifunctional.
Step 8
Now for the fun part! Not really. Clean up is by far the worst part of crafting. To make collecting the leftover glitter for future use a bit easier, I worked on two large sheets of thick poster board. Scoop your leftover glitter from your work surface onto your paper or styrofoam plate. Then very carefully bend the plate at the edges to funnel the glitter back into its jar. I found that a paper plate works best for this.

And there you have it! Three beautiful, glitzy pumpkins to add some sparkle to your home or office while the temperature drops outside.

Don’t forget to follow my Instagram for updates on my life and sneak peaks of what’s to come on Chic Little Honey!

These are so cute and classy! I’m definitely going to make some “glitzy” pumpkins this year!
LikeLike
Thanks! Let me know if you do…I want to see them!
LikeLike
Ohh, I LOVE these! SO cute!!!!
LikeLike
I loveeee the pumpkin with the cascading glitter! They’re all so pretty but that one is my favorite haha
LikeLike
These have to be the best DIY pumpkins I have ever seen!
LikeLike
Thank you so very much!
LikeLike
I’m so obsessed! You’re so talented!!
LikeLike
Thanks! I think I just got lucky that these turned out so well!
LikeLike
I am just now seeing this! This looks absolutely amazing all done up. Great job!
LikeLike
Thanks girl! I’m glad you like them!
LikeLike